Simple Gradient Style Shading
Even with the advent of 3d models video games still occasionally call for great 2d art. Here I'm going to show you a quick way of coloring your sketches in GIMP. It can be done with a mouse and can look really great if you take your time. These images aren't the best but they get the point across. GIMP is basically like Photoshop but it's free. You can download it for either Linux or Windows at gimp.org The right mouse button is used to access many functions in gimp.

That's the gimp toolbox.
The first step is to scan the image. A dpi of 300 should be fine and save it immediately in bmp format. Make another copy to work with. You should only save in jpg when it's time to store the image on the web or in a game.
Now clean up the image by playing with brightness/contrast settings and erasing unwanted noise. The image below has lots of noise to clean up.

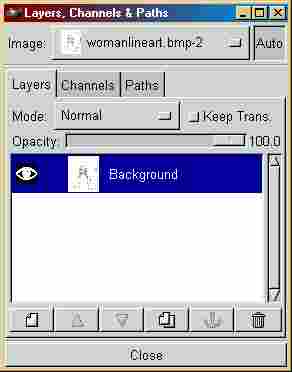
Now if you haven't done so open the image in GIMP. Now we're going to add an alpha layer to the background layer. This will allow us to put other layers beneath this one. Do this by right clicking on the image, going to "layers-layers, channels, and paths" to open this display below. Then right click on the background layer and choose "add alpha channel". Now we're going to change the layer type to darken only by clicking "mode-darken only".
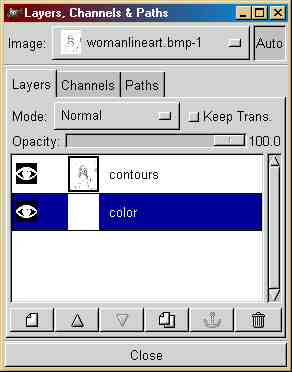
Add an extra layer for our gradients by clicking the icon near the bottom which says (when moused over) "new layer". It should be of the solid white type. Then click the down arrow near the bottom to shift that new layer to the bottom of the stack. I've renamed by original layer to the name of contours and the new background layer as color, but it doesn't matter.
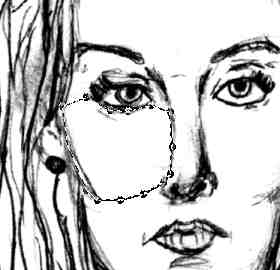
Make sure that the color layer is selected from now on and we're going to select certain areas of the image. Use any selection tool you like. They are along the top of the tool box.
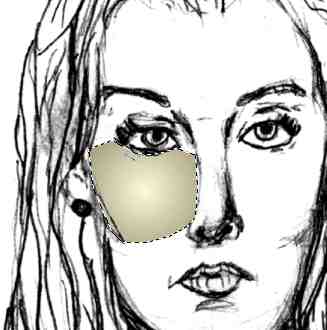

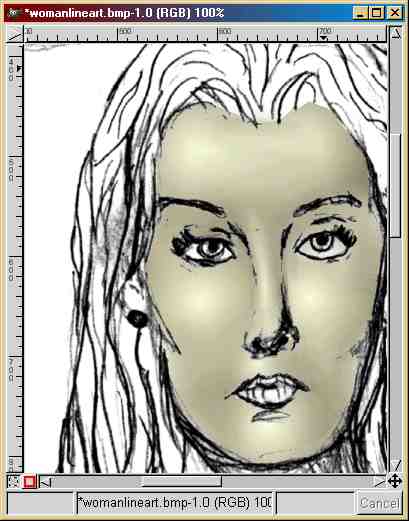
Good. Now we'll apply a gradient to that area. First click the gradient tool [15th icon from left to right in the toolbox] and then double click it to bring up the options. Use a radial type gradient and fill the area in with color. Go ahead and play with gradient options to understand them. Now select a new part and use an appropriate gradient to fill in that area until it's all filled in.
Now using smearing, paintbrush, airbrush and any other tool, smooth out the seams. Now you can touch up the color and shading with airbrush tools and image settings. Continue this process until the image is done!
Hopefully I'll have the finished image posted at my site when it's finished, but we're done for now. Next time I want to write an article about coloring shaded pictures which is a lot more complicated to explain, but not very hard to do. Thank you for your time and happy coloring!!!
Discuss this article in the forums
Date this article was posted to GameDev.net: 4/30/2002
(Note that this date does not necessarily correspond to the date the article was written)
See Also:
General Art
© 1999-2011 Gamedev.net. All rights reserved. Terms of Use Privacy Policy
Comments? Questions? Feedback? Click here!