Creating the code
We have our classes ready, time to start writing the actual code.
Point primitives are not much different from the other primitive types available (triangle strips, lists, etc.). We can still choose what vertex shader we use.
A vertex shader tells DirectX about what type of vertices it can expect - such as whether they are already transformed, if they have a diffuse color, and so on. Since I'm mainly aiming this tutorial at 2D gaming, I'm going to use slightly customized TL vertices. This stands for Transformed and Lit, which means the vertices already are transformed and that the lighting color has already been computed. So an X of 300 will be 300 on the screen, and the vertex color will be the final color.
Public Const D3DFVF_TLVERTEX = (D3DFVF_XYZRHW Or
                  D3DFVF_DIFFUSE Or D3DFVF_TEX1)

 Public Type typeTRANSLITVERTEX
   X As Single
   Y As Single
   Z As Single
   rhw As Single
   color As Long
   tu As Single
   tv As Single
 End Type
We will need an array to contain the point sprites
Private vertsPoints() As typeTRANSLITVERTEX
Next up is the "Reset" method. Here we will reset the individual particles. Since this is just a collection using the Particle class, we can basically hard code numbers in here. Since this first example will be a fire effect, we will set the properties to look like a fire. Note I have named the "collection" "colFireFX" as well.
With Particles(I)
   Call .ResetIt(X, Y, -0.4 + (Rnd * 0.8), -0.5 - (Rnd * 0.4), 0, -(Rnd * 0.3), 2)
   Call .ResetColor(1, 0.5, 0.2, 0.6 + (0.2 * Rnd), 0.01 + Rnd * 0.05)
 End With
 This might look a bit complex now, but it really is not. There are lots of Rnd's in there. This is because the "flame" of the fire should be different every time, a bit irregular. That is what this code does: it changes the X and Y speed a bit, and also the Alpha and decay value. Check out the picture to the right for the results. The nice thing is that you can do so much with a simple particle engine like this just by modifying a few lines of code. This might look a bit complex now, but it really is not. There are lots of Rnd's in there. This is because the "flame" of the fire should be different every time, a bit irregular. That is what this code does: it changes the X and Y speed a bit, and also the Alpha and decay value. Check out the picture to the right for the results. The nice thing is that you can do so much with a simple particle engine like this just by modifying a few lines of code.
The decay value is the amount of "Alpha" (visibility) that is subtracted from the Alpha value every frame (based on the time). When the Alpha drops below zero, the particle will be reset, using the Reset method.
We need to initialize the arrays as well, both for the point list and the particles themselves, which will be done using a simple loop. Pretty straightforward. We simply reset all the particles now. Because of this, it will look the fire is "turned on" for the first few seconds.
For I = 0 To ParticleCounts
   Set Particles(I) = New Particle
   vertsPoints(I).rhw = 1
   Call Reset(I)
 Next I
The size of the particles is set with:
lngFloatSize = FtoDW(25) '//Size of our flame particles..
Note that this code uses this special function:
Public Function FtoDW(f As Single) As Long
   Dim Buf As D3DXBuffer
   Dim L As Long

   With ObjD3DX
    Set Buf = .CreateBuffer(4)
    .BufferSetData Buf, 0, 4, 1, f
    .BufferGetData Buf, 0, 4, 1, L
   End With

   FtoDW = L
 End Function
This function will put a "single in a long" (float in a dword), which is required for the .SetRenderState D3DRS_POINTSIZE and some other PointSize render states.
We still have to make the particles move. This is nothing more than looping through all particles in the array, and call "UpdateParticle." This method will change each particle:
 Public Sub UpdateParticle(sngTime As Single)
   sngX = sngX + sngXSpeed * sngTime
   sngY = sngY + sngYSpeed * sngTime

   sngXSpeed = sngXSpeed + sngXAccel * sngTime
   sngYSpeed = sngYSpeed + sngYAccel * sngTime

   sngA = sngA - sngAlphaDecay * sngTime
 End Sub
That's about as tough as the math gets. We simply update the position of the particle based on the speed, the acceleration and the time. The Alpha value decreases as well, based on the time.
The particle has changed now. Therefore, we have to update the vertex associated with this particle. We only have to update the position and the color.
vertsPoints(I).color = D3DColorMake(.sngR,.sngG, .sngB, .sngA)
 vertsPoints(I).X = .sngX
 vertsPoints(I).Y = .sngY
After finishing the "Update" sub in our collection, the particles have been moved and the vertices (point sprites) have been updated.
Since we have already covered creating, resetting and updating, it's time for rendering. Rendering is similar to how you would render any other primitives. Due to the fact that vertex buffers are complicated to set up and to modify, I'm using DrawPrimitiveUP to render my vertices. With point sprites, this is done as follows:
First enable pointsprites:
 With ObjDev
   .SetRenderState D3DRS_POINTSPRITE_ENABLE, 1 'True
   .SetRenderState D3DRS_POINTSCALE_ENABLE, 0 '//I don't need it..
 End With
We need to set a certain alphablend state to get that "glowing" effect:
 With ObjDev
   .SetRenderState D3DRS_SRCBLEND, D3DBLEND_SRCALPHA
   .SetRenderState D3DRS_DESTBLEND, D3DBLEND_ONE
   .SetRenderState D3DRS_ALPHABLENDENABLE,1
 End With
Then render:
 '//Set up the vertex shader
 .SetVertexShader D3DFVF_TLVERTEX

 '//Set our texture
 .SetTexture 0, myTexture

 '//And draw all our particles :D
 .DrawPrimitiveUP D3DPT_POINTLIST, ParticleCounts, vertsPoints(0), Len(vertsPoints(0))
You might have noticed the texture. The texture controls (for this particle engine) which part of the particle is seen. It should be grayscale, since we set the colors manually. Changing the texture can result in interesting effects. For example, changing the texture in a "flare" texture will give the particles an entirely different look!
 
Once rendering is complete, you need to disable the point sprites again:
 With ObjDev
 .SetRenderState D3DRS_POINTSPRITE_ENABLE, 0 'True
 End With
That's it for the rendering (be sure to change any renderstates you have modified back to the values they were).
A small point for optimization: The "Len(vertsPoints(0)" could simply be changed to a constant, or a value that is set once. Then the Len() function isn't required anymore, speeding up the rendering just a bit.
Remember, it's way more efficient to render as much as possible with one DrawPrimitive call.
We are ready with the code inside our particle class and collection.
To create an instance of our particle collection, we simply use the normal VB way for it:
 Dim myNewFire As colFireFX
 Set myNewFire = New colFireFX
 myNewFire.ParticleCounts = 150
 myNewFire.ReLocate 400, 400
 myNewFire.Begin
And in our render loop we only have to use two lines of code to get the particle effect on the screen:
myNewFire.Update
myNewFire.Render
Check out the source (or the compiled exe) to see it working.
What do we have now?
Right now we have a simple particle engine. It does not have things like gravity, or attraction of particles to each other. But don't think you cannot do anything with this simple engine. You can simply change the "Reset" code a bit, and you can get truly wonderful things.

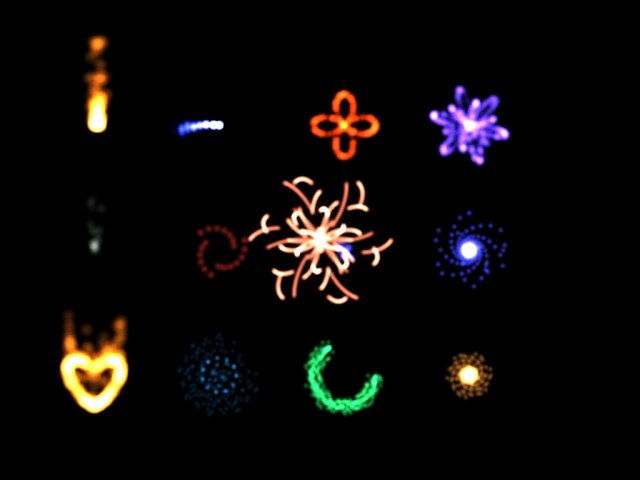
While trying to make some simple particle demos I was surprised at the power of this simple particle engine. Just changing a few numbers can generate wonderful particle collections. The source contains quite a number of the interesting patterns generated by code. Often a small change of a number can result in a completely new pattern.
The particle class and the collection class can easily be inserted into a 2D project and used instantly. Then you can try to experiment with the arguments or formulas in the Reset() method. There is a lot to experiment with. For example, with some of my demonstration patterns, changing the particlecount will change the entire look of the pattern.
I hope this tutorial sheds some light on particles and how to use point sprites in DirectX together with Visual Basic.
Almar Joling
www.persistentrealities.com
|